Sunday, 30 October 2011

How to start private browsing feature in Mozilla Firefox

0 comments
Private Browsing:
    This is an important feature of mozilla firefox browser. By activating this feature anyone can access the internet from the mozila firefox and the browser do not save anything. It will not save anything means that it wont save the browsing history as well as not save any user name and password. So it is good to activate this feature whenever you are browsing the internet on any cybercafe or within a network of shared computer.

How to start Private browsing feature on Mozila Firefox:
 Just press  ctrl + shift + P  simultaneously whenever you are accessing internet from Mozila Firefox.
After pressing those keys firefox will ask a  confirmation message to start this.
Just Click on "Start Private browsing" . A new window will be opened in firefox for private browsing.Now Private browsing feature is enable on your browser.
To again come backto general browsing feature press  ctrl + shift + P again.
This is one part of the page How to Update various setting on Mozilla Firefox

Other Similar articles that may interest you:
1. Keyboard shortcut keys on MS-office Power Point
2. How to Increase the torrent download speed
3. Add "Task manager" to" context menu of Windows
4. Add or remove desktop icon in windows
5. Break Administrator and user login Password in Windows
6. Change Boot-Screen, start up logo and log-in Screen in Windows
7. Definition of User Account in windows
8. Customize the power button action in windows Seven start menu
9. Serial key of typing master Pro V7.0 free download
10. What was new in Internet Explorer 9
Continue reading →
Saturday, 22 October 2011

How to download a Youtube video or audio or any file using IDM (Internet Download Manager)

1 comments
Internet Download Manager is one of the down-loader that people are using for download various audio, video or any other type of file from the internet. To download any file from the internet via IDM, then our browser (Internet explorer, Google Chrome, Mozilla Firefox, Apple Safari, Opera, Netscape etc.) should be integrated with IDM.

Also Check: How to enable Graph Search on Facebook

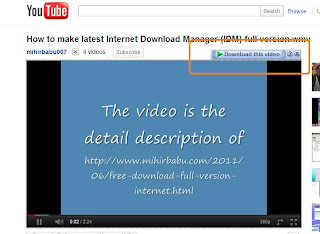
When any browser is integrated with IDM, then whenever we try to download something automatically it will download in IDM. No need to do any thing. If it comes in general download then the website may not support the down-loader  One of the most important feature of IDM is whenever we are playing any video or audio live streaming then an additional download option is shown at the side of the video screen. This will help us to download from you-tube.

How to integrate or add or remove any browser from IDM (Browser and system integration feature):
1. Open Internet Download Manager.
2. Click on "Downloads" on Menu bar of IDM.
3. Choose "Option"
4. A pop up window "Internet Download Manager Configuration" will be opened.
5. Navigate to "General" tab.
6. tick the check box "Use advanced browser Integration"
7. Now select the browsers that you want to integrate with IDM and tick on the check boxes.

It almost support all the browsers like Internet Explorer, Google chrome, Mozilla Firefox, Apple Safari, Opera, Netscape navigator etc..

Also See: List Of Top Ten Web browser for Windows

8. if you are using any other browser except the above then you can add that by "Add browser" option.
9. After selecting the browser you want to integrate. Apply the changes and press OK.
10. Now close all the open windows and Application and reboot your system .
After reboot you will find that IDM is associated with all the browser that you are integrated for download.

Other Similar articles that may interest you:
1. Keyboard shortcut keys on MS-office Power Point
2. How to Increase the torrent download speed
3. Add "Task manager" to" context menu of Windows
4. Add or remove desktop icon in windows
5. Break Administrator and user login Password in Windows
6. Change Boot-Screen, start up logo and log-in Screen in Windows
7. Definition of User Account in windows
8. Customize the power button action in windows Seven start menu
9. Serial key of typing master Pro V7.0 free download
10. What was new in Internet Explorer 9
Continue reading →
Friday, 21 October 2011

How to start private browsing in Google Chrome (Incognito Mode)

0 comments

Private Browsing (Incognito Mode):
This is the same as the private browsing feature in Mozilla FireFox. But here its name is "Incognito Mode".
The feature of incognito modes are:
1. Browser does not save your browsing history and the password.
2. Your downloaded file is present in the hard disk but the browser have not any download history.
3.All  new cookies are deleted after you close all  incognito windows that you've opened.
4. Changes  made to your Google Chrome  bookmarks and general settings while  in  incognito  mode are always saved.
    So it is always good to browse the Internet in incognito mode whenever you are browsing the Internet on a shared computer or in a cybercafe.
Also See: Latest Google Chrome Offline Installer free download
How to start Incognito Mode feature on Google Chrome:
    This process works on Windows, Mac, Chrome and Linux based OS.
To start this feature on windows, chrome and Linux based Operating system just press "ctrl+shift+N" simultaneously whenever you are accessing Internet from Google Chrome.
To start this feature on MAC Operating system just press "Command+shift+N" simultaneously whenever you are accessing Internet from Google Chrome.
  After pressing those keys a new window will be opened with incognito mode will be opened. Start browsing Internet on that window and enjoy the above described feature.
at the same time you also can access the Internet on google chrome in general window, that is opened previously.

Other similar articles that may interest you:
1. Create a boot able pen-drive for Windows Xp, Vista and seven
2. Avg Pc Tune up latest with key free download
3. Add change theme option as a shortcut to context menu
4. Free Download IDM with serial key
5. How to create an invisible folder so that others can not see
6. How to make Window 7 genuine
8. How to become a fast typist
9. Shortcuts to Create a new folder in Window 7
10. How to create a con folder without using Command Prompt
Continue reading →
Monday, 17 October 2011

How to start private browsing feature and restore the Private browsing confirmation Prompt in Mozila Firefox

0 comments
Private Browsing:
    This is an important feature of mozila firefox browser. By activating this feature anyone can access the internet from the mozila firefox and the browser do not save anything. It will not save anything means that it wont save the browsing history as well as not save any user name and password. So it is good to activate this feature whenever you are browsing the internet on any cybercafe or within a network of shared computer.

How to start Private browsing feature on Mozila Firefox:
   To start this just press ctrl + shift + P simultaneously whenever you are accessing internet from Mozila Firefox.
After pressing those keys firefox will ask a  confirmation message to start this.

Just Click on "Start Private browsing" . A new window will be opened in firefox for private browsing.Now Private browsing feature is enable on your browser.
To again come backto general browsing feature press ctrl + shift + P again.

This is an update of  http://www.mihirbabu.com/2011/10/how-to-start-private-browsing-feature_30.html
 Trouble shooting:
When ever you are staring private browsing feature on the confirmation prompt An check box (Do not show this message again) is available. If you accidentally select this option then whenever again you will start private browsing feature this dialogue box will not come. So that you will be not able to know wheter you are in private browsing or not. So you need to activate that warning messsage again.
To do so follow these:
1. Open firefox.
2. Now type "about:config" without quotes on the address bar and hit enter.
3. It will again show a confirmation prompt. Be careful that the check box there "Show the warrenty next time"  is selected.
4. Click on "I"ll be careful, I promise " button.
5. A configuration window will be open.
                   
6. Now type  "private" on the filter box.
7. You will find that the key "browser.privatebrowsing.dont_prompt_on_enter" is set to be true.
 If it is in true. Then it will not ask the confirmation prompt.
8. So change the value to false. To cahnge its value just double click on it.

How to start Private browsing automatically whenever we are opening firefox.
    To do so just change the value of "browser.privatebrowsing.autostart"  to true on step 7 of trouble shooting.

Other Similar articles that may interest you:
1. Add your own photo as a background image on USB Pendrive
2. Add Network Connection as a shortcuts in Mouse right click
3. Make a Windows Drive hidden and unsearchable
4. Create a folder with no name or with a blank space
5.  Working codes on Nokia Mobile
6. How to add/Remove user Accounts in Windows
7. Process to open Registry editor and Group policy editor
8. How to make Windows 7 Genuine
9.  How to create an invisible folder
10.  Latest version Safari browser free download
Continue reading →
Sunday, 16 October 2011

How to enable or disable "Open file - Security warning " message in windows Xp, Vista and Seven

1 comments

Generally this message appars during opening a file or application that is downloaded from internet. You can enable or disable the message by the following process

1. Open Control panel and navigate to Internet Properties option. Now choose "Internet Properties".
or Type "inetcpl.cpl" without quotes on RUN window or in the start search box And hit enter.
2. Internet Properties window will be open.
3. Now navigate to "Security" tab.
4. Choose "custom level".
5. A new window for "Security setting" will be opened.
6. Now search for "Launching application and unsafe files (not recommended)"
7. There you will find the three option. (Disable, enable and prompt .)
   By default prompt option will be selected.

8. Work of those options
Disable - This will not allow the file or application to be run.
Enable(not secure) - This will not show any warning before opening the application and file.
Prompt(recommended) - This will ask every time before opening those.
9. Choose the option of your own that what behaviour you want to see for those files and application.

Other Similar articles that may interest you:
1. Keyboard shortcut keys on MS-office Power Point
2. How to Increase the torrent download speed
3. Add "Task manager" to" context menu of Windows
4. Add or remove desktop icon in windows
5. Break Administrator and user login Password in Windows
6. Change Boot-Screen, start up logo and log-in Screen in Windows
7. Definition of User Account in windows
8. Customize the power button action in windows Seven start menu
9. Serial key of typing master Pro V7.0 free download
10. What was new in Internet Explorer 9
Continue reading →
Saturday, 15 October 2011

How to lock the Windows computer easily or shortcut keys for lock the computer

0 comments
This will describe you how easily you can lock your windows xp, Vista and Seven. You will able to lock your computer from your keyboard. Some keyboard defines a personal key to lock the computer. But the process is for those which do not have that key.

Press the   +  L simultaneously.After pressing those keys automatically windows will lock and ask you again to click on the user and also ask for password (if enable) to log in.If the fast user switching is enable for the user accounts then if those keys were pressed then it will redirect directly to the log in screen.(it is same as switch user option)

Other Similar articles that may interest you:
1. Replacer free download for Windows
2. Keyboard shortcut keys to lock Windows
3. How to choose the high quality video file from its name (tags)
4. How fatal error causes system crash
5. Keyboard hotkeys of Microsoft office front page
6. How to add a transparent logo to a video file
7. Change the default name of new folder to your own name
8. Add Program and Features to context menu
9. Add Copy/Move to Folder option to the right click of Selected item in Windows
10. Add your personal Information to the System property Window
Continue reading →
Friday, 14 October 2011

How to enable or disable permanently appear Menubar in Windows XP, Vista and Seven Explorer

1 comments

Menu bar is a region on the screen that contain also drop down menus. The purpose of menu bar is to provide some essential windows application like saving , editing, copy move, paste, help etc...
To enable or disable menu bar press "alt" on your keyboard. This will hide or show your menu bar temporarily.

1. Open Control Panel
2. Choose classic view for displaying control panel items.
3. Select folder Option. (Screen shot below will show you how the folder option icon is displayed)
Also Check: Add folder option As a shortcut to the Windows Context Menu.
4. On the pop up window "Folder option" Navigate to "view" tab.
5. There you will find an option "always show menus".

6. Just tick that option and apply the changes.
You will find the menu bar appear permanently on the window.
To disable the menu bar just unchecked  the option on step6.

Other Similar articles that may interest you:
1. Winrar Free download Full Evaluation copy in Various languages
2. Create a con folder without using command prompt (cmd)
3. Keyboard shortcuts to create a new folder in window seven
4. Latest opera browser free download for Windows, Linux and Mobile
5. How to download eBook from Google Books Search
6. how to enable Menu-bar appear permanently
7.. Show/Hiide Windows Version on desktop
8.  How hard disk results in system crash
9. Keyboard shortcut keys on MS-Office outlook
10. How to disable copy/move to usb or External device
Continue reading →
Thursday, 13 October 2011

How to create automatic login without asking for password in windows Xp, Vista and Seven

0 comments
This will change the windows log in process. After the boot screen no login screen will appear. Even if there is a password on your system, it will not ask for the password but log in automatically.
Process:-
1. Type "control userpasswords2" without quotes on RUN window or in the start search box and hit enter.
2. A new window "User Accounts" will be opened.
3. Now navigate to users tab.

4. Here you will find "Users must enter a user name and password to use this computer".
5. If you uncheck this then it will be logged in automatically. And if you check in this then it will ask for the password.
6. A dialog will allow setting a user and password to be used automatically.
7. Now apply all the changes and Press OK.
8. Now close all the open window and reboot your system and Enjoy the changes.

Other Similar articles that may interest you:
1. How to save any web page as pdf
2.  How to create an Automatic login without asking password
3. How to change processor name in windows
4. How bios setting may cause system crash
5. Working Shortcut keys for Windows XP, Vista and Seven
6. How to use VLC Media player as a Camera Software
7.  How to set your desired wallpaper as a Folder Background
8.  Add folder option as a shortcut to context menu
9. Create shortcuts for shutdown restart and logoff
10. How to create a folder with any name (con)
Continue reading →

How to enable or disable classic windows view in vista and seven

1 comments
Sometimes we face a problem as we are trying to install a theme or a customization pack (Linux or seven or vista or mac transformation pack) And it works good. But after uninstallation it changes the default views of vista or seven to windows classic. So here is the process to enable or disable classic windows view in any higher version of windows operating system.
Process:
1. Right click on My computer and select properties.
2. Now click on Advanced setting on the left side of the screen.
3. A pop up window will be opened.
4. Navigate to "Advanced Tab"
5. In the "Performance" option choose setting.
6. A pop up window with name "Performance option" will be opened.
7. Now navigate to "visual effect" Tab.
8. On the custom option scroll down the horizontal scroll-er .
9. At the bottom of this , you will find "Use visual style on windows and button"

10. If you tick this option , windows will add visual effect of your windows operating system and looks beautiful.
11.if you uncheck this then windows classic view option will be your default view.
Now you choose of your own that which style of view you want to make default.

Other Similar articles that may interest you:
1.  Break a Samsung Mobile Password without using 3rd party Software
2.  Group policy editor application free download
3.  Latest IDM with patch download free
4. AVG Antivirus 2012 free download full
5. How to take ownership of a file
6. Latest Maxthon Web browser free download
7. Avast Pro Antivirus with key free download
8.  How to enable/Disable Classic view in Windows
9.  What is System Property In Windows?
10. How Bad ram causes system crash or Hangs
Continue reading →

How to synchronize or update the computer time or clock with Internet time.

0 comments
Some times we find that our computer is not showing the perfect time. Then we can modify the time or time zone manually. But it is not sure that whatever we make changes in time is perfect. So it is better to synchronize or update the time from internet server. For this your system must be connected to internet.
To update the time from internet follow these.
1. Select on time displayed at the right side of the taskabar.
2. A window displaying calender and clock will be opened there.
3. Now select change date and time setting.
4. A new window will be opened.
5. Navigate to "internet time" tab.
6. Now click on "Change setting"
7. A new window will be opened.
8. Now tick on synchronize with an internet server.
9. Now choose from which server you want to update your time on the server box.
10.Now click on update now.

It will ask you to for waiting some time and after some time you will see the changes. Now apply all the changes and press OK.

Other Similar articles that may interest you:
1. Add your own photo as a background image on USB Pendrive
2. Add Network Connection as a shortcuts in Mouse right click
3. Make a Windows Drive hidden and unsearchable
4. Create a folder with no name or with a blank space
5.  Working codes on Nokia Mobile
6. How to add/Remove user Accounts in Windows
7. Process to open Registry editor and Group policy editor
8. How to make Windows 7 Genuine
9.  How to create an invisible folder
10.  Latest version Safari browser free download
Continue reading →
Wednesday, 12 October 2011

How to increase the system performance through My computer in Windows Xp, Vista and Seven

0 comments
Here you can speed up your system by changing some extra visual effect on your system. This will take a small change in visualization and makes system little faster.
Steps:
1. Right click on My computer and select properties.
2. Now click on Advanced setting on the left side of the screen.

3. A pop up window will be opened.
4. Navigate to "Advanced "Tab.
5. In the "Performance" option choose setting.
6. A pop up window with name "Performance option" will be opened.
7. Now navigate to "visual effect" Tab
8. In the custom option uncheck these options,
Fade or slide menus into view
Fade or slide Tool Tips into view
Fade out menu items after clicking
Show Shadows under menus
show shadows under mouse button
Slide open combo boxes
Slide task bar buttons
Use a background image for each folder type.

After that system will look some different and nice And perform faster.

Other Similar articles that may interest you:
1. Replace AM/PM with some other text in Windows taskbar
2. Picasa Picture Viewer can also be used as a Camera device
3.  How to activate missed call alert free in BSNL/Cellone
4. How to create a Paypal donation button for Website
5. Add Desktop Icon setting as a shortcut in Context menu
6. How to play Screen saver during playback of Windows Media Player
7. How to create a hidden and Unsearchable file
8. How to get secure from unwanted calls on Samsung Mobile
9. How to customize Winzip Command in Context menu for a selected item
10. How to show/Hide Windows Clock from taskbar
Continue reading →

How to get the Faster search result in windows XP, Vista and Seven

0 comments
In otherwords turns off indexing to get faster search result.
Generally windows keeps a record of all the files stored in your computer. So when ever we search for a file or folder in our search box it gives us the result from there. By turn on the indexing search becomes faster than before. It increases the search speed but it decreases the normal file command like open, close, copy, move etc..
If you do not need to search from a lot then you can also turn this feature off.
To turn on the feature follow these:
1. Open my computer.
2. Right click on a drive and select properties.
3. At the boom of the properties window you will see "Index this drive for faster searching" (Screenshot is from vista OS you will find the similar term on others)

4. For faster searching tick it. otherwise uncheck it.
5. A new pop up window will appear asking apply this to all subfolders or not. Select apply to all subfolder and click Ok.
6. It will take some time depending upon your system speed.
After the process ends you will feel the changes.

Other Similar articles that may interest you:
1. Add Change Wallpaper option as a shortcut to context menu
2. How to make turbo c++ full screen in Windows Vista
3. Some Working Mobile codes on Samsung Mobile
4. Google Chrome Offline Installer free download for windows
5. How to Hard reset or format a Nokia E-Series Mobile.
6. How to change the look of vlc media player to Windows Media Player
7. Latest Phaseout Internet browser free download
8.  How to Start Private browsing in Mozila-Firefox
9. How to Increase the system speed
10. List of top reasons why a system hangs or Crash
Continue reading →

Increase the system speed by deleting the temporary files in windows Xp, Vista and Seven

0 comments
After some times of uses of windows temporary files on various location are created. Which may increase time to time, After some days it becomes a huge amount which affect our system and it goes down slow. So we have to delete those temporary files periodically.
Out of various temporary folder location here we described about the three.
1. folder which contain the temporary windows files
2, Folder which contain the temporary local user files.
3. Prefetch folder.

To delete the temporary files from the above folders follow these steps:
1. type the following codes (temp or %temp% or prefetch) in Run window or in start search box.
2. Then hit enter.
3. A folder will be opened after requesting your permission.
4. Select all the files from the folder and delete the files. (Don't delete the containing folder it will may harm your system)
5. Type all the three codes one by one to delete all the temporary files.
After deleting all the temporary files don't forget to empty the Recycle Bin.
After that your system processing speed will become a little faster.

Other Similar articles that may interest you:
1.Add Disk Defragment option to context menu as a shortcut
2. How to Remove the Arrow from the shortcut Icons
3. Add Start Command Prompt from here to Context menu as a shortcut
4. Latest VLC Media Player Keyboard shortcuts
5. Add Window Colorization option to Context menu as a shortcut
6. Add Appearance Setting to Context menu As a shortcut
7. Add Administrative tool option to context menu as a shortcut
Add a warning or Legal notice before the Log-in Screen of Windows
9. How to break a BIOS/CMOS Password
10. Customize Winrar Commands on Context menu
Continue reading →
Tuesday, 11 October 2011

How to correct system hangs during startup of windows XP, Vista and Seven

0 comments
Sometimes we face a problem like After logon on windows our system continues to hangs for sometimes (2 or 3 minute). At that time we are unable to access the start button as well as the taskbar. Mouse shows the busy symbol.This is due to a specific service named as "Background Intelligent Transfer". If we disable this service then only we will recover from this .
Steps:
1. Type "msconfig" without quotes on start search box or in RUN window and then hit enter.
2. A new window named "System Configuration" will be opened.
3. Now navigate to "Services" tab.
4. Search for Background Intelligent Transfer and uncheck it.
5. Now apply the changes and click on OK.
6. It will ask for reboot. Then just reboot your system and enjoy the changes.


Other Similar articles that may interest you:
1.  Break a Samsung Mobile Password without using 3rd party Software
2.  Group policy editor application free download
3.  Latest IDM with patch download free
4. AVG Antivirus 2012 free download full
5. How to take ownership of a file
6. Latest Maxthon Web browser free download
7. Avast Pro Antivirus with key free download
8.  How to enable/Disable Classic view in Windows
9.  What is System Property In Windows?
10. How Bad ram causes system crash or Hangs
Continue reading →
Monday, 10 October 2011

Top 10 Considearable factors before buying a Laptop or Notebook

0 comments
Laptops are complex little machines with a variety of configuration options which can lead us to confusion before buying. There are several factors we have to consider before buying a Laptop or Notebook. If we choose the best feature , then only our system will show better performance. It is best to buy the latest or updated version.

Some of the Important factors are for consideration before buying a Laptop or Notebook are described below:

1. How much You have to spent-
    First you have to choose the amount that you will spend on buying a Laptop or Notebook. Then only you will select the other factor for best performance.
2. Size Of your Laptop-
    Then You have to choose a size for your Laptop. Generally people uses 13" or 14" or 15" screen for laptop.
3. Weight-
   The lighter laptop is easy to move around. Prices have an inverse relationship with the weight of the Laptop.
4. Battery Power-
   Battery life is the important considerable factor for laptop . Because when we have a journey with our work then if the battery goes down then we will face problem.
5. Processor and processing Power-
   We have to choose always the latest processor. As they are modified by showing other old Processors problem. One processor is made with various processing speed, So we have to choose the best speed.
6. RAM-
  RAM is random access memory. This is the primary storage device. Its capacity control the processing speed. So try to buy the Maximum available RAM memory.
7. Storage Capacity-
   It refers to the Hard disk of the laptop. It means how much space you required for data storage. It is depend upon users requirement. You can also add an extra Hard disk externally in futures.
8. Operating System-
   It means on which operating system you will feel good to work. Some of the laptops are based on a particular type of operating system. Other operating system may be supported but they show the best result on that operating system.
9. Graphic Card-
   This is not so important. Graphic card increase the display quality. So it is better seen when we are watching a movie or playing games.
10. Warranty Plan-
    This is good to choose a better warranty plan so that if any problem occurs then it will be rectify by the specialist of the company.

Other Similar articles that may interest you:
1.  Break a Samsung Mobile Password without using 3rd party Software
2.  Group policy editor application free download
3.  Latest IDM with patch download free
4. AVG Antivirus 2012 free download full
5. How to take ownership of a file
6. Latest Maxthon Web browser free download
7. Avast Pro Antivirus with key free download
8.  How to enable/Disable Classic view in Windows
9.  What is System Property In Windows?
10. How Bad ram causes system crash or Hangs
Continue reading →
Saturday, 8 October 2011

various tag line (Dvdrip,Divx,CAM etc) of a movie - What does it mean.

0 comments
Whenever we are downloading a movie from any of the internet source, then the movie files name is a long name with some tag line except the original name of the movie. These tags line describe the original source of the video.By showing these tags we can choose a better quality of the video.

CAM -
 This is a theatrical rip. This is generally a recorded video from theater using Digital Video Camera. So the sound and video ualiy of the videos are not so good.
TELESYNC (TS) -
This is same as the CAM except that an extra additional audio recorder is used.
TELECINE (TC) -
A telecine machine copies the video and audio directly from the reels. So the audio and video quality may high but the cost of the equipmant used are very high.
SCREENER (SCR) -
A screener is used in pre VHS tape that are provided to various stores for promotion. Its quality may varie from xcellent to  very poor according to the captured device used in tapes.
DVD-SCREENER (DVDscr) -
It is same as the screener but transferred offa DVD.
DVDRip -
This is the copy of finally released DVD.
VHSRip -
Transferred off a retail VHS, mainly skating/sports videos and XXX releases.
TVRip -
These are recorded from Tv either using digital cable/settop boxes ordirectle record from internet.
WORKPRINT (WP) -
This is the copy of the film that has not been finished.
===================================================================
FORMATS

VCD -
VCD is an mpeg1 based format, with a constant bitrate of 1150kbit at a resolution of 352x240 (NTCS). VCDs are generally used for lower quality transfers (CAM/TS/TC/Screener(VHS)/TVrip(analogue) in order to make smaller file sizes, and fit as much on a single disc as possible. Both VCDs and SVCDs are timed in minutes, rather than MB, so when looking at an mpeg, it may appear larger than the disc capacity, and in reality u can fit 74min on a CDR74.
SVCD -
SVCD is an mpeg2 based (same as DVD) which allows variable bit-rates of up to 2500kbits at a resolution of 480x480 (NTSC) which is then decompressed into a 4:3 aspect ratio when played back. Due to the variable bit-rate, the length you can fit on a single CDR is not fixed, but generally between 35-60 Mins are the most common. To get a better SVCD encode using variable bit-rates, it is important to use multiple "passes". this takes a lot longer, but the results are far clearer.
XVCD/XSVCD -
 These are basically VCD/SVCD that don't obey the "rules". They are both capable of much higher resolutions and bit-rates, but it all depends on the player to whether the disc can be played. X(S)VCD are total non-standards, and are usually for home-ripping by people who don't intend to release them.
KVCD -
KVCD is a modification to the standard MPEG-1 and MPEG-2 GOP structure and Quantization Matrix. It enables you to create over 120 minutes of near DVD quality video, depending on your material, on a single 80 minute CD-R/CD-RW. We have published these specifications as KVCDx3, our official resolution, which produce 528x480 (NTSC) and 528x576 (PAL) MPEG-1 variable bit rate video, from 64Kbps to 3,000Kbps. Using a resolution of 352x240 (NTSC) or 352x288 (PAL), it's possible to encode video up to ~360 minutes of near VCD quality on a single 80 minute CD-R. The mpeg files created will play back in most modern standalone DVD players. You must burn the KVCD MPEG files as non-standard VCD or non-standard SVCD (depends on your player) with Nero or VCDEasy.
DivX / XviD -
DivX is a format designed for multimedia platforms. It uses two codecs, one low motion, one high motion. most older films were encoded in low motion only, and they have problems with high motion too. A method known as SBC (Smart Bit-rate Control) was developed which switches codecs at the encoding stage, making a much better print. The format is Ana orphic and the bit-rate/resolution are interchangeable. Due to the higher processing power required, and the different codecs for playback, its unlikely we'll see a DVD player capable of play DivX for quite a while, if at all. There have been players in development which are supposedly capable, but nothing has ever arisen. The majority of PROPER DivX rips (not Re-Encs) are taken from DVDs, and generally up to 2hours in good quality is possible per disc. Various codecs exist, most popular being the original Divx3.11a and the new XviD codecs.
CVD -
CVD is a combination of VCD and SVCD formats, and is generally supported by a majority of DVD players. It supports MPEG2 bit-rates of SVCD, but uses a resolution of 352x480(ntsc) as the horizontal resolution is generally less important. Currently no groups release in CVD.
DVD-R -
It is the recordable DVD solution that seems to be the most popular (out of DVD-RAM, DVD-R and DVD+R). it holds 4.7gb of data per side, and double sided discs are available, so discs can hold nearly 10gb in some circumstances. SVCD mpeg2 images must be converted before they can be burnt to DVD-R and played successfully. DVD>DVDR copies are possible, but sometimes extras/languages have to be removed to stick within the available 4.7gb.
MiniDVD -
MiniDVD/cDVD is the same format as DVD but on a standard CDR/CDRW. Because of the high resolution/bit-rates, its only possible to fit about 18-21 mins of footage per disc, and the format is only compatible with a few players.
Continue reading →
Friday, 7 October 2011

How to display or hide the windows version on desktop of Windows XP, Vista and Seven

0 comments
This will enable or disable the showing of windows version at the bottom of right side corner just above the taskbar. Windows version will describe the which version of Operating system you are currently using.

To do so follow these steps:
1. Open registry editor (type "regedit" without quotes on start search box or in RUn window and hit enter)
2. Now navigate to

HKEY_CURRENT_USER\Control Panel\Desktop

3. On the right-hand side, locate "PaintDesktopVersion"
4. Double click it on ur mouse or Right click of mouse there and select modify.
5. Now change the value in value data field on the pop up window to 1.

6. Now click OK.
7. Now close the registry editor and all the other open window and restart your system.
8. After restart you will find the windows version on your desktop.
NOTE:
To again hide the windows version from desktop just change the value to 0 on step 5.
  0 = Hide Windows version from desktop
  1 = Show Windows version on desktop

Other Similar articles that may interest you:
1.Add Disk Defragment option to context menu as a shortcut
2. How to Remove the Arrow from the shortcut Icons
3. Add Start Command Prompt from here to Context menu as a shortcut
4. Latest VLC Media Player Keyboard shortcuts
5. Add Window Colorization option to Context menu as a shortcut
6. Add Appearance Setting to Context menu As a shortcut
7. Add Administrative tool option to context menu as a shortcut
Add a warning or Legal notice before the Log-in Screen of Windows
9. How to break a BIOS/CMOS Password
10. Customize Winrar Commands on Context menu
Continue reading →
Thursday, 6 October 2011

How to Change the processor name in windows

0 comments
This will change the name of the processor which is displayed on the system properties window..By this we will modify the old processor name with a new processor name or with our name or some of our desired text. By adding a new processor name the quality of the processor will not change it will only modify the name not its processing speed or capacity. By this you can also make some one fool by showing a new latest processor on your very old PC. This is just for enjoyment. Don't try to cheat others by this.

Steps:
1. Open Registry Editor and Navigate to the following key.
 HKEY_LOCAL_MACHINE\HARDWARE\DESCRIPTION\System\CentralProcessor\0
 2.Now in the right side pane you will find "ProcessorNameString".
   This will describe the current processor name in your system.
 3. Now double click on the mouse there and a new window having name "Edit string"will be opened.  or Right click of mouse on "ProcessorNameString" and sect modify. Anew window with name Edit string will be opened.
5. Now modify the text on the "value data field" . The text will be displayed in place of your processor name in system properties screen.
6. Now press F5 or click refresh on mouse.
7. Now you will find the modified processor name in system properties screen.
Other Similar articles that may interest you:
1.How to Show/Hide drive letter in Windows
2. Total Video Converter with Patch download
3  RemoveWat free download
4. How to install VLC skin
5. Latest Deepnet Explorer browser free download
6. How to download a youtube video
7. How to get faster search result in Windows Search
8. How over heating and power supply causes system crash
9. Add drive disk clean up option as a shortcut to context menu in Windows
10. Create a bootable pendrive for Windows Xp, Vista and Seven
Continue reading →

What is system propertis window or screen AND How to check it in windows

0 comments
System Property Screen:
It contains the detail description of system. It describes every thing like hardware software configuration ,activation report, cpmuters name and description. It also contain the detail security about the system. It also contain error report and solution.

How to check the system Property:
Process:-1
1. Open Control Panel.
2. Select "System And Maintainance"
3. Choose system.
System Property screen will be opened.
Process:-2
1. Right click on MY computer icon on desktop.
2. Choose Properties.
System Property screen will be opened


Other similar articles that may interest you:
1. Create a boot able pen-drive for Windows Xp, Vista and seven
2. Avg Pc Tune up latest with key free download
3. Add change theme option as a shortcut to context menu
4. Idm full free download
5. How to create an invisible folder so that others can not see
6. How to make Window 7 genuine
8. How to become a fast typist
9. Shortcuts to Create a new folder in Window 7
10. How to create a con folder without using Command Prompt
Continue reading →
Wednesday, 5 October 2011

How to Edit (Add/remove) option on send to menu in windows Xp, Vista and Seven

0 comments
In other words we can add our favorite folder or program as a shortcut on SEND TO menu. Generally for a selected file or files in send to menu desktop or any removable device or bluetooth device is there. But by this process we can add any drive or any folder placed any where on our system also any program as a shortcut on the send to menu. This will very helpful in data transfer.
This will explain how you can add or delete items from the “Send to” menu list in Windows 7, Windows Vista and Windows XP.
Process:
1. Navigate to the following folder in windows
      For XP Users-
C:\Documents and Settings\(User-name)\SendTo
  For vista and seven users-
C:\Users\(User-name)\AppData\Roaming\Microsoft\Windows\SendTo

Here user-name refers to the user name of your system where you currently logged in. Type the user name on that place without the braces.

2. There you will find all the shortcuts that are included in the shortcut menu of your windows.Add or delete whatever you like on that folder.Any modification on that folder will change the items on send to menu.

3. To delete any item from the send to menu. Just select that and right click of mouse on it and select delete and hit enter.
4. To add any application or a folder as a shortcut you follow this-
 Right click of mouse on an empty space of the open folder -> Select new -> Select Shortcut -> Now choose the application or a folder as shortcut. Click ok.
Now you will find an extra option on the send to menu.

5. I have created a shortcut for d drive on the send to menu.


If you find some error during the modification of the send to folder.  Then it is required to take ownership of the send-to folder to logged user. 

Other Similar articles that may interest you:
1. create modify login password of other user in windows
2. how to insert or delete from a registry
3. How to change drive letter in windows
4.  Serial key of tune up utility 2010 free download
5. Add your Own folder to the favorite bar of windows Vista
6. Mozila Firefox latest version free download
7. Resource hacker and how to use it
8.  Disable "Open file Security warning" in Windows
9. What to see before buying a Laptop
10. How virus causes system crash
Continue reading →

Followers